Using ShareBrowser Admin
ShareBrowser Admin allows you to create ShareBrowser users and gives you control over indexing schedules. Indexing is how the EVO scans files to get metadata and confirm their existence.
Login to ShareBrowser Admin
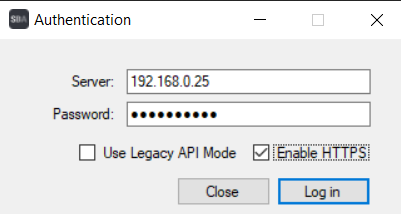
To log into ShareBrwoser Admin, enter the IP address for your EVO, and enter the default Admin password: adminpw111.
If using HTTPS with EVO v7+ check the box for Enable HTTPS.
Refresh Button and Server Log
The Refresh button in the bottom left will rescan the volumes that the ShareBrowser server can see.

The Server Log displays information about which volumes the EVO indexer can see.
ShareBrowser Users
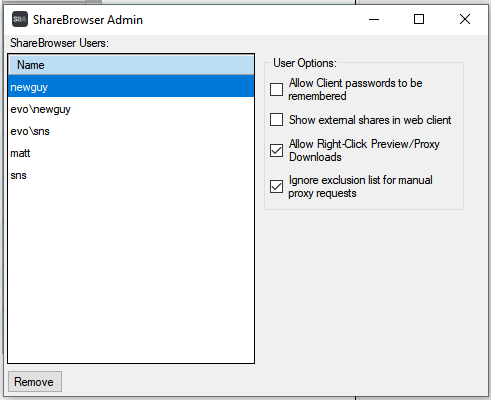
In the lower right corner of the ShareBrowser Admin window is a button to Manage Users. The ShareBrowser user database is kept in sync with the EVO user database. The user permissions need to be administered with EVO’s Web Interface.
If the EVO is bound to an Active Directory or LDAP domain, a ShareBrowser user will be created for the AD/LDAP user when they first login to ShareBrowser.
If a user is deleted from ShareBrowser via ShareBrowser Admin->Manage Users, any bins they own (whether private or public) will be removed.
Remembering Client Passwords
In the upper right, under User Options, there is a checkbox to enable ShareBrowser login passwords to be remembered. This is ‘disabled’ by default.
Note
The Remember password selection box will not be activated the first time the ShareBrowser client logs in, but will become available at the next login.
Show External Shares in Web Client
This checkbox under User Options will allow users of ShareBrowser Web App to be able to see 3rd party NAS shares and indexed volumes that are not EVO shares.
Disable Proxy Downloads
In the upper right, under User Options, there is also a checkbox to Allow Right-Click Preview/Proxy Downloads. This is a global toggle that will allow users of the ShareBrowser Web App to download previews or Edit-Ready proxies directly from a browser.
Ignore Exclusion List for Manual Proxy Requests
This checkbox under User Options allows the users to bypass the proxy exclusion file type list when making a proxy request directly from ShareBrowser via the right-click context menu.
ShareBrowser Indexing
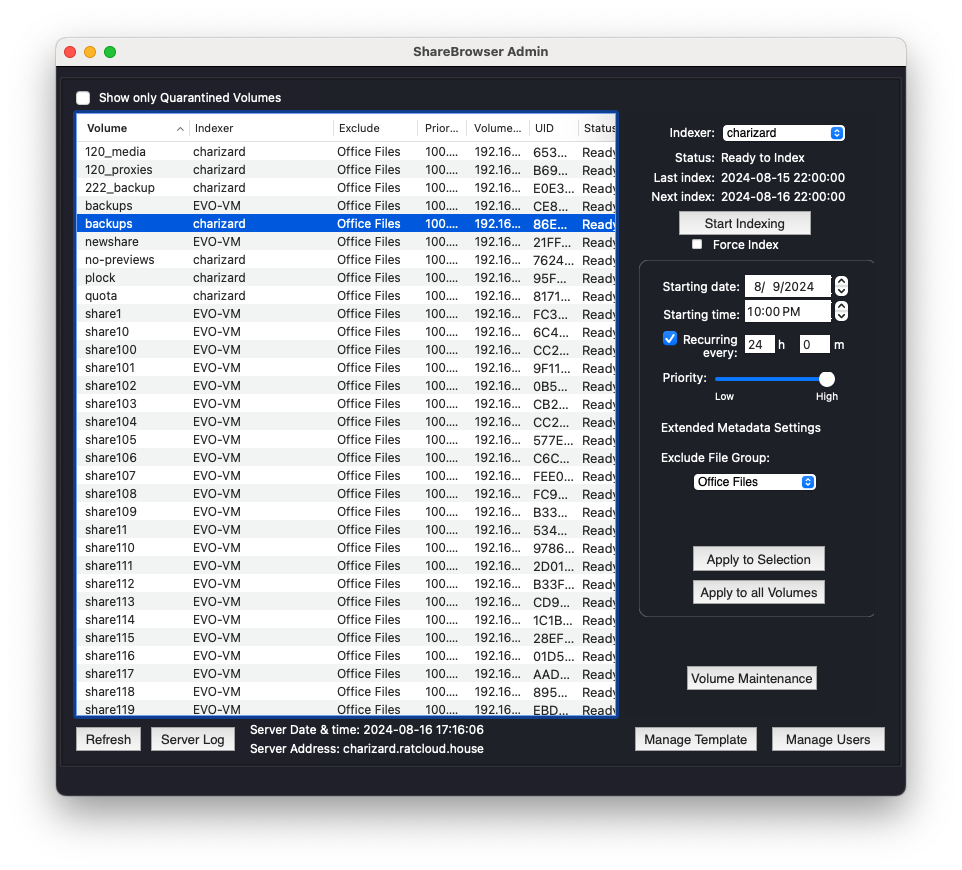
ShareBrowser will allow you to administer multiple EVO’s indexers if applicable.
To choose an indexer for the volume, click the dropdown menu and select the hostname for the EVO to do the indexing.

Using EVO as an Indexer
The EVO Indexer must be used for assets to appear in the ShareBrowser Web App. See Configuring Preview Generation on EVO for more details.
Note
Please note: As of ShareBrowser 5.0.3, any volumes that can be seen by the EVO (internal or external) will automatically get the EVO assigned as their indexer and be scheduled to index on a nightly basis.
Scheduling an Index
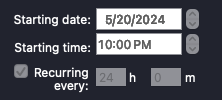
To schedule an index, choose the starting date and time as well as how often you would like it to recur. This can be applied to the selected volume or to all volumes. The Priority Bar will determine which volumes will take precedence. This can be applied to the selected volume or to all volumes.

Force Index
The Force Index checkbox will tell the database to re-index the entire volume when an index occurs, even if no changes are apparent.
Excluding Files from Indexing
If an administrator wants to filter what types of files are indexed, they can assign them to a new File Type Group in the Exclude File Group list.
This could be useful for leaving out general office documents, disk images, and other local files to keep the index focused on media files (or whatever you choose).
To set up an exclusion list, first click the dropdown under Exclude File Group, and choose Add/Change File Groups.
Click the plus sign in the lower left of the File Group Filter window to create a new group and give it a name.
After naming the group, use the plus sign in the lower right to add files to be assigned for exclusion.
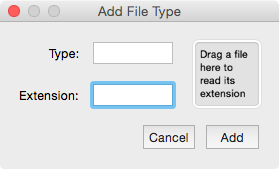
Once the desired files have been added, make sure to highlight the group on the left, and then click the check boxes next to the desired file types. This can be applied to the selected volume or to all volumes.
Now the File Group can be chosen and excluded from the extended metadata indexing.
Harvest File Type and Size
The Harvest File Type and Size checkbox will collect this information in addition to the metadata collected during an index.