ShareBrowser Tags, Comments and Custom Metadata
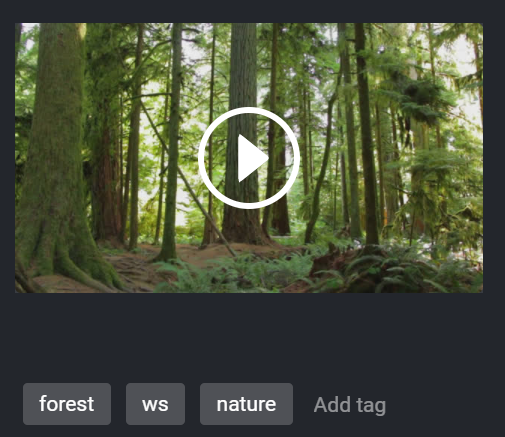
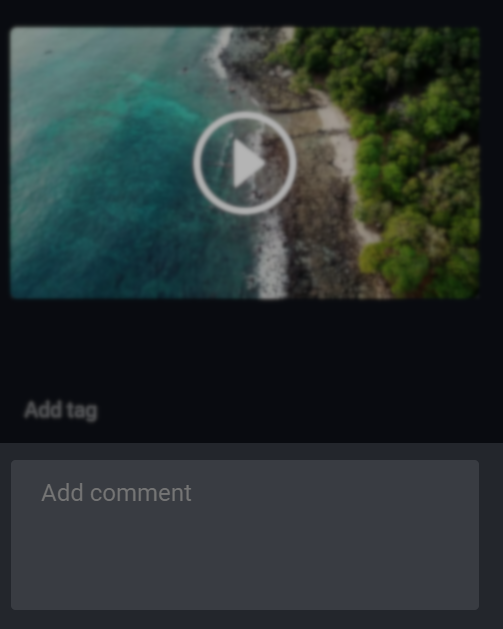
ShareBrowser gives you the ability to add tags, comments and other custom metadata to your files and volumes. This additional metadata will be searchable by all users in the ShareBrowser.
To add a tag, select the file(s), then type new tags, separating each tag with a comma. The tags will append to any previous tags. This will automatically save. To remove tags, click the ‘x’ icon on each tag.
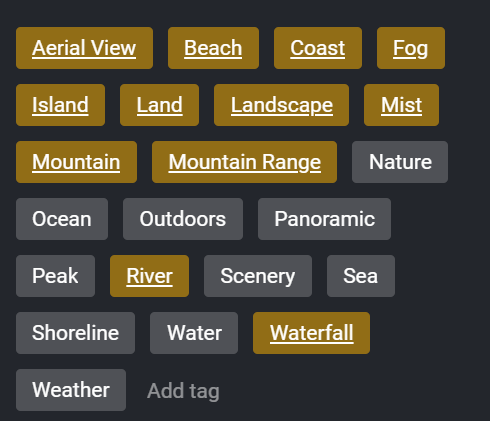
Automatically Search for Tags
You can automatically search for a tag by clicking the tag once so that it’s underlined, then clicking again.

Multi-select Tags
You can multi-select tags by ctrl+clicking tags or Shift selecting.
Bulk Add Tags to Folders
To apply tags to all files in a folder and any subfolders, type the tag in the section Bulk tag folder/existing contents
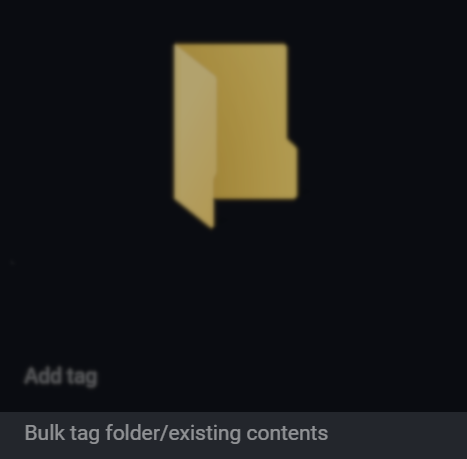
This will apply the new tags to everything that ShareBrowser is aware of within the chosen directory (including the directories that it contains).
Add a Comment
To add a comment, type into the Add Comment box, this will automatically save. If a comment is added to a file with an existing comment, through a multi-select process, a space will be added and the new comment will be added in the comments section.
ShareBrowser Tag Auto-Completion
ShareBrowser will auto-complete tags that it already sees in the database. These will appear in a drop-down menu when a user begins to type a tag.

To choose a tag simply arrow up or down to the tag and press Enter.
To remove a tag from the auto-complete list, simply remove the tag from all files that have that tag.
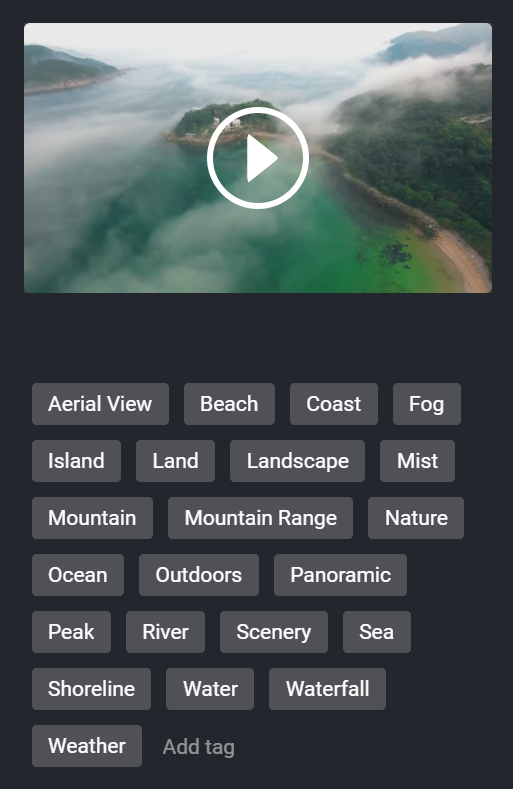
ShareBrowser AI/ML AutoTagging
To use the AI/ML Auto-Tagging feature of the ShareBrowser Web App, it must first be configured by the administrator, instructions can be found in our knowledgebase. Once this is configured, a user can simply choose the Analyze button on an asset.
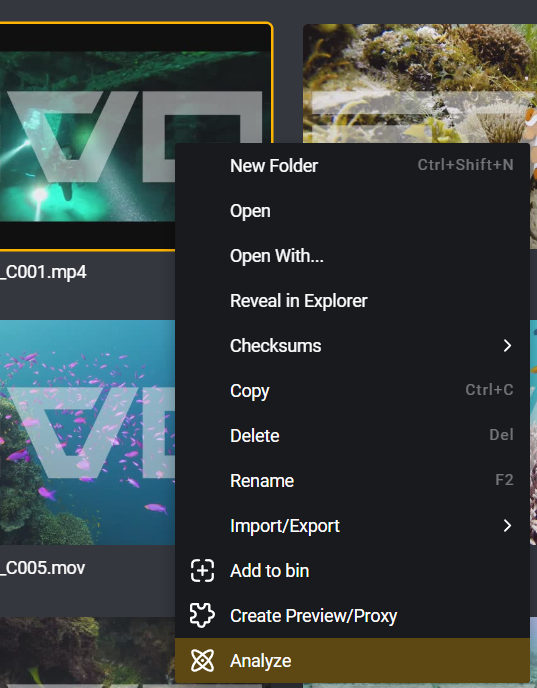
This will optionally request a PIN, set by the administrator on setup, to allow processing in the cloud. Once the file is processed, the tags will be available in the tags section on the clip.
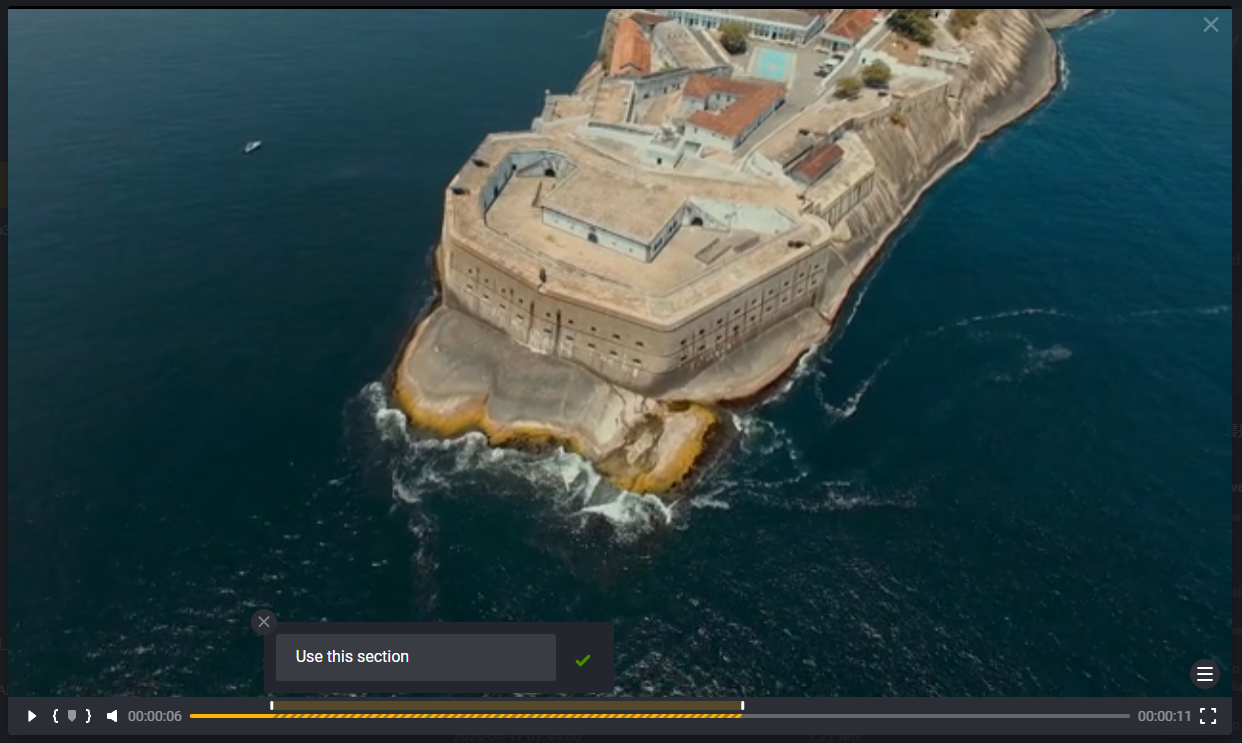
Markers and Subclips
When previewing clips in ShareBrowser it’s possible to add markers and create subclips which will transfer to Adobe Premiere Pro and DaVinci Resolve.
To add a marker simply click ‘m’ or click the marker icon ![]() .
.
This will prompt you for a comment which becomes a marker comment.
You can leave any number of markers in a clip.
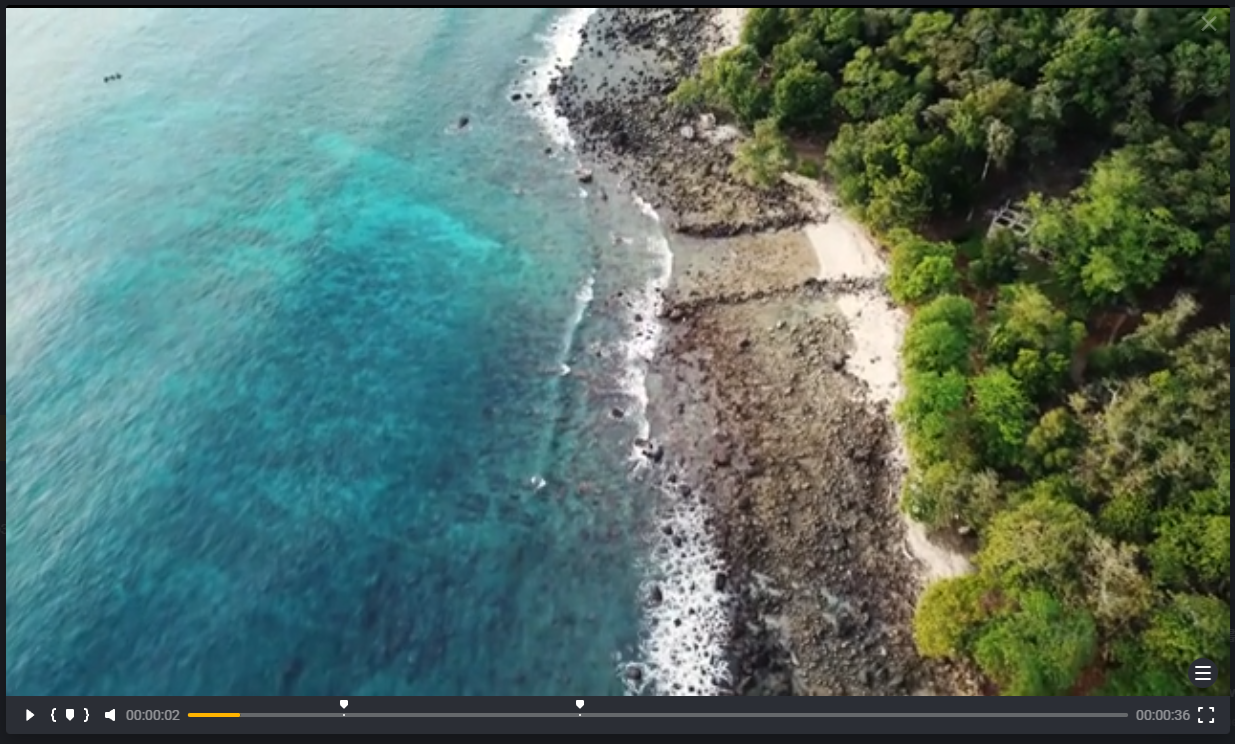
Subclips can be created by marking in and out using ‘i’ and ‘o’ or the corresponding icons ![]() ,
, ![]() . This will also prompt you for a comment.
. This will also prompt you for a comment.
Once a file has markers and subclips they can be viewed in the right hand pane of the player
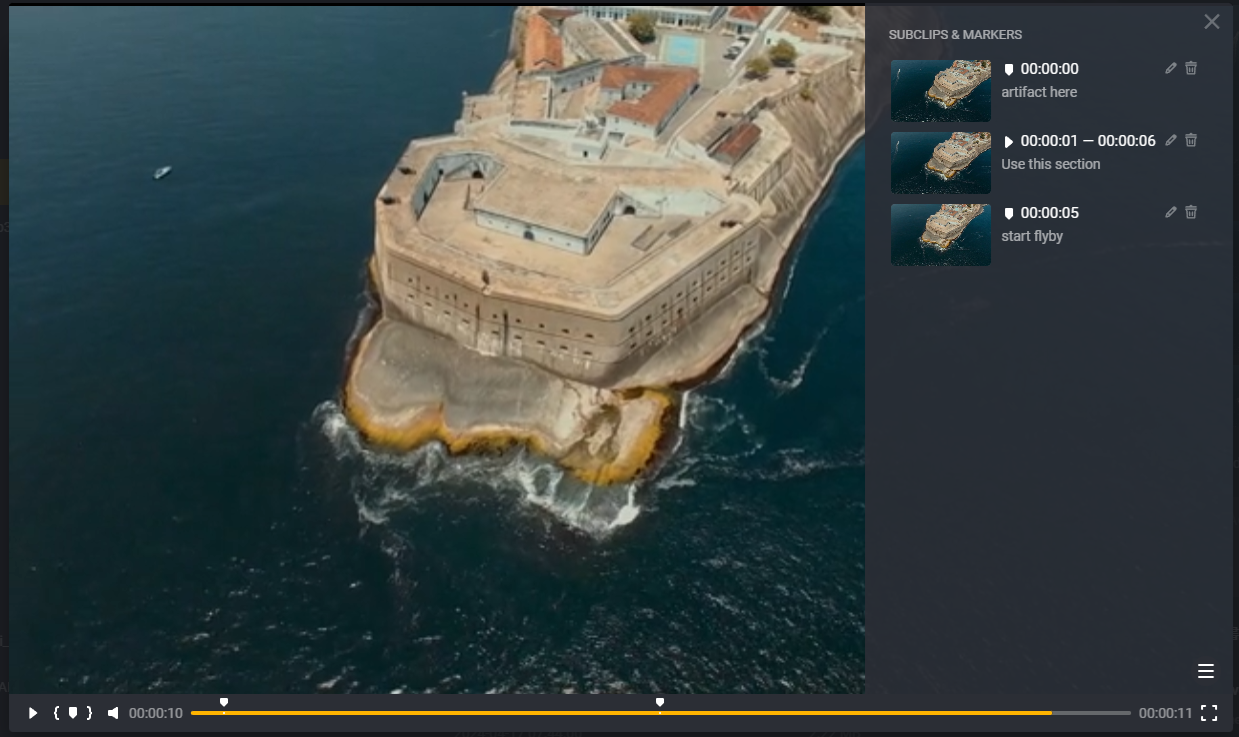
Or from the right-hand pane in the main interface.

To change or delete markers or subclips use the pen ![]() and trash
and trash ![]() icons on the corresponding entry.
icons on the corresponding entry.
For more on using markers and subclips see the sections on the Adobe Extension and the Resolve Workflow Integration Plugin.
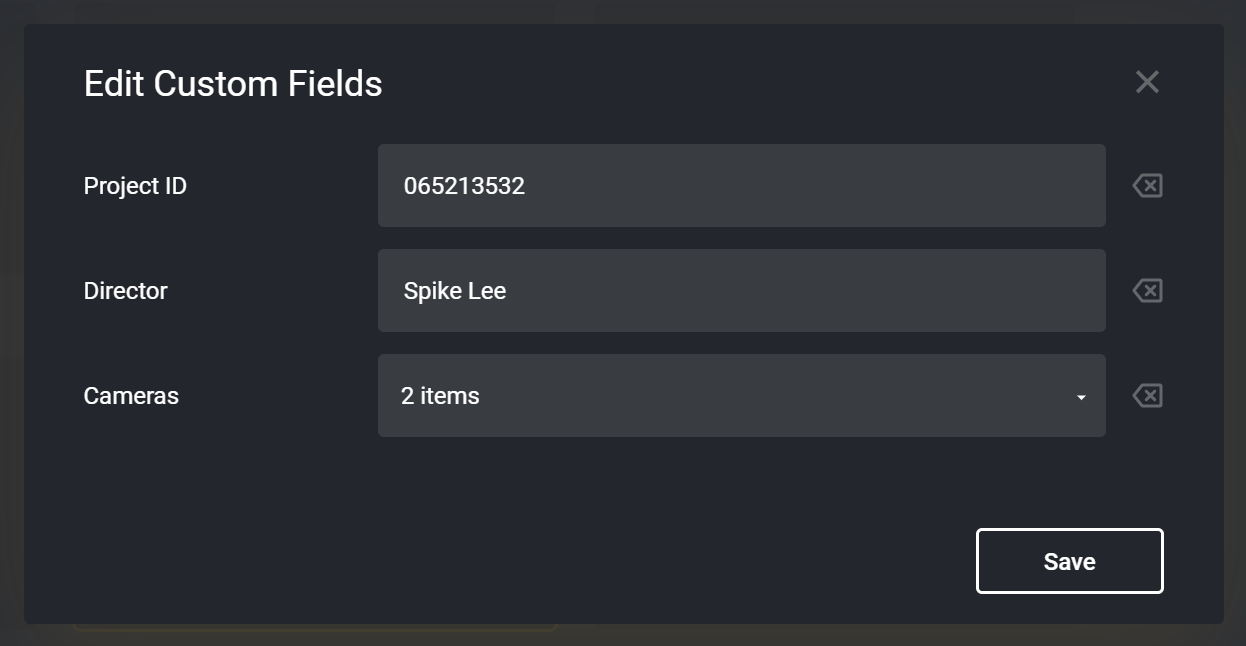
Custom Metadata Fields
ShareBrowser includes custom metadata fields that can be defined
by the administrator. Instructions on configuring this can be found in Configuring Custom Metadata Fields.
To add the custom metadata to a clip, click the  button next to the
custom metadata field name. Next, edit the fields to be added to the
clip and click Save. These clips are now searchable by the custom
metadata fields.
button next to the
custom metadata field name. Next, edit the fields to be added to the
clip and click Save. These clips are now searchable by the custom
metadata fields.